Workpiece surface measurement
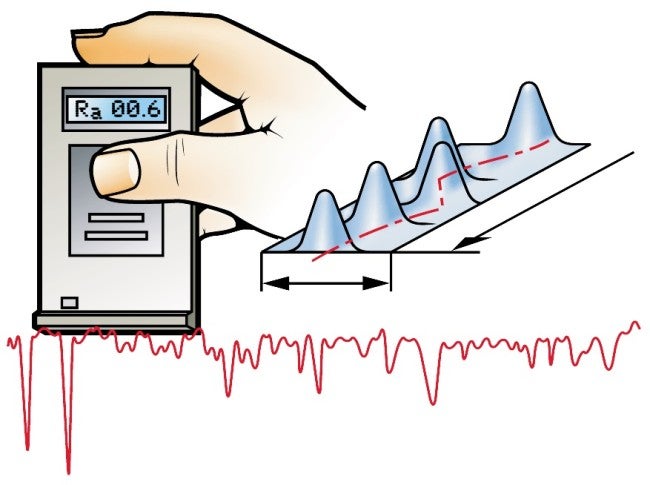
The surface texture generated on the workpiece can be described by three basic parameters:
- P-profilePrimary profile, an overall profile.
- W-profileWaviness profile.
- R-profileSurface roughness profile. The R-profile is calculated by using a cut-off filter to remove the longwave components from the P-profile. The R-profile is therefore an intentional modification of the P-profile.
Basis for evaluation
When measuring workpiece surface textures, evaluation is usually based on one, specified reference length. If the reference length is not determined in the component design drawing, then the person who measures the surface texture must determine the reference length.
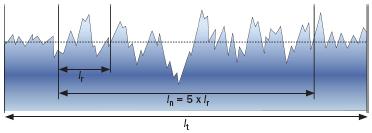
Measuring lengths
lt= the total length (comprises the starting, evaluation and stopping length).
ln= the evaluation length (comprising five reference lengths is standard).
lr= the reference length.
Parameters based on the R-profile:
The most common parameters in the R-profile are:
Ra

Mean line
Evaluation of the arithmetical mean deviation of the assessed profile.
Ra Mean roughness of the profile
A mean value of all deviations from a straight line within the evaluation length, irrespective of the vertical direction. This means that it is impossible, using an Ra-value, to determine whether the deviations are peaks or valleys. Ra is not significantly affected by individual deviations, which means that there is also a risk of missing a large peak or a scratch.
The most common Ra-value for metal surfaces are between 0.02 μm and 3.5 μm – the lower the value the finer surface (0.02 μm = mirror blank).
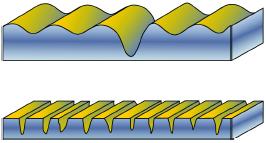
Example of drawing indication:

Ra= 2 μm
The surface textures appear very different yet still show the same Ra-value.
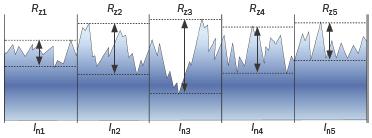
Example of drawing indication:


Rz Maximum profile height (average)
The maximum profile height is the mean value of the individual profile heights, Rz ,obtained between the largest peak height and the largest valley depth within the evaluation length. Usually, there are five reference lengths, but the number can vary with modern measuring equipment. The Rz-value in the reference length that shows the highest deviation is called the Rzmax or Rmax.
Example of drawing indication:

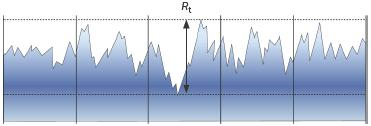
Rt Total profile height
The total height of the profile is the sum of the height of the largest profile peak height and the largest profile valley depth within the evaluation length (which normally comprises five reference lengths). A single Rt-value (which is not combined with Rz or Ra is one of the most rigid demands in the R-profile.
Example of drawing indication:


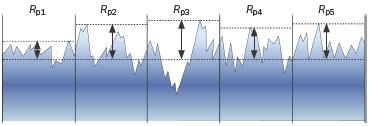
Rp Maximum peak height (average)
The maximum profile peak height is the mean value of the largest individual profile peak heights, Rp, obtained within the reference length. The surface roughness parameter, Rp, together with, Rz, can provide information about the surface characteristics.
Profile depth

Material ratio
c = Reference level

RmrThe material ratio (Abbot-Firestone curve)
The most suitable method for obtaining a measurement of the ”wearability” of an item is to assess the material ratio of the surface. Rmr is given in %. Evaluating the material ratio is a simple method used to indicate the level of a surface defect.


